http://img1.qq.com/comic/pics/13772/13772815.jpg


part 1
http://www.u-file.net/f-nuv2584
part 2
http://www.u-file.net/f-feb0624
part 3
http://www.u-file.net/f-pub6568
part 4
http://www.u-file.net/f-skl5826

choux 發表在 痞客邦 留言(0) 人氣()

Create Aurora Borealis - North South Polar Lights Wallpaper in Photoshop CS3


Learn in this tutorial how to make a nice looking aurora borealis.
For the beginning let’s create a new file (File>New) of 1600x1200 px and 72 dpi. Using the The Paint Bucket tool fills adjacent pixels that are similar in color value to the pixels you click.'); return false" href="javascript:void(0)">Paint Bucket Tool (G), fill the new file with black color.
Next we need to select the Gradients Tool (G) and fill the new file from its top to the bottom with a transparent gradient.
Choose on the top panel the same option, demonstrated below:
After that enter the filters’ palette Filter>Distort>Wave… and set the next indicated parameters:
We’ll get the next result…
Using the Rectangle Tool (U), try to stretch out the rectangle on the whole canvas. Next select on this layer Blending Options>Gradient Overlay, by making a click on this layer on the layer’s palette and choose the appropriate selections.
 
Gradient Editor are also indicated there.
You need to get the same thing from below:
On the same layer we must set the next shown option, chosen out of the layers’ palette.
On this stage, we have to press Alt
button while making a mouse click between the gradient’s layers and the
layer containing the rays. In this case the layers should be put over.
After that, mark out both layers on the layers’ palette and press Ctrl+E to Merge Down.
Then make a copy of the new layer we’ve got (Ctrl+J) and stretch out the copy up to the lowest edge of the canvas, applying the Free Transform option.
This option may be selected, by pressing Ctrl+T.
Set the Blending mode-Screen for the stretched copy on the layers’ palette

choux 發表在 痞客邦 留言(0) 人氣()


This tutorial teaches you how to create a stylized Christmas tree design with stars.
For the beginning create a new file (File>New) of 1280x1024 px and 72 dpi. Select the Paint Bucket Tool (G) and paint the primary layer the way it's demonstrated below:
Take now the Rectangle Tool (U)
and stretch out the figure on the whole canvas. Set the next
demonstrated parameters, making a mouse click on this layer on the
layers' palette
Create one more layer, giving it the Opacity of 0%.
Give next indicated parameters for the made layer:
Now it's time to represent a rounded element, applying the Ellipse Tool (U), giving it also the Opacity of 0%.
Follow the shown parameters:
It's the result you must get on this stage:
Select now the Brush Tool (B) and try to represent the contours of a fir tree, like on the next picture:
Select out of the Custom Shape Tool (U) the same star indicated below:
Fill the whole fir tree's inside space with selected stars, changing also their sizes (Ctrl+T)
One star should be situated on the fir tree's top, giving it the next parameters:
This is the image you should get now:
Next we'll select three types of snowflakes, like those from below:
Placing the snowflakes in an arbitrary way on our picture, we may change their Opacity parameter on the layers' palette: Fill: 10%, 20%, 40%.
Choose out of the already known table a kind of figure like the next one:
Place it under the layer containing the top star, the same way situated below: Fill 0% on this layer:
Next we should select the next demonstrated parameters:
This is the next stage of the picture:
Take now the Pen Tool (P) and represent several fillets on the fir tree, choosing the next colors' codes:
The final result!
View full size here.

choux 發表在 痞客邦 留言(2) 人氣()


按ctrl + N新建一个图形文件,宽度为320PX,高度为128px,白色背景。然后设置前景色颜色为黑色。然后用字体工具在文件上随便写一个你想要做出效果的字。本例选择的字体是AddElectricCity如图1所示。

choux 發表在 痞客邦 留言(0) 人氣()

本实例主要运用了选区、图层混叠属性、通道处理、模糊滤镜、光照滤镜、曲线调整、layer style等工具,大家可以举一反三,做出自己喜欢的颜色和效果。  按ctrl + N新建一个图形文件,宽度为800PX,高度为800px,白色背景。然后设置前景色颜色为R 26,G 104, B175。然后用字体工具在文件上随便写一个你想要做出效果的字。本例选择的字体是Times New Roman,字体属性Bold +Italic。如图1所示。   按住ctrl键不放,在文字图层上单击一下,选中文字。然后使用Select / Modify / Contract,输入16 px。缩小选区,如图2所示。 

choux 發表在 痞客邦 留言(0) 人氣()


引用來源有製作過程和更清晰的照片。
引用來源

choux 發表在 痞客邦 留言(0) 人氣()

Gag讀作"gεk7";「家叻切」。根據劍橋網上字典,「gag」解作「a joke or funny story, especially one told by acomedian」,意謂「笑話」。「gag」一字已切底融入廣東話,並衍生出其他港式英語。另外,中文中「gag」乃從人部,因為「gag」是人搞出來的。
 

choux 發表在 痞客邦 留言(0) 人氣()


choux 發表在 痞客邦 留言(0) 人氣()

本文來源:psper.tw
對於大約3周前才發售的PSP-3000來說,目前仍然處於新機生命週期的初級階段。不過SONY應該會很高興的聽到破解駭客們對最近發售的版本無能為力。
迄今為止,駭客們只做到了用PSP slim上的CPU更換到新機上以求破解,而不再像過去那樣可以通過軟件方式成功破解PSP。
Dark Alex,作為最受歡迎的PSP破解以及自製程式開發社區中的一員,目前也沒有找到破解這個移動設備的方法。整個PSP自製程式社區似乎也一下子陷入了困惑和迷茫之中。

果PSP-3000不能被破解,那麼SONY將會在這場針對盜版和自製程式社區的持久戰中獲得最終的勝利。在PSP的這個生命週期裡,SONY一直試圖通
過發佈軔體更新來增強系統的安全性,阻撓駭客們的破解計劃。當然最終都失敗了。在過去的那些歲月裡,駭客已經不再對破解PSP然後從遊戲的拷貝中獲取利益
感興趣了,他們相信自己有能力也有權利對PSP做任何事情。

choux 發表在 痞客邦 留言(0) 人氣()


PSP 3000破解了!
"可玩下載遊戲"
 

choux 發表在 痞客邦 留言(0) 人氣()


一個可以搜索youtube短片里面人們的說話的搜索引擎,不過應該暫時只限英文

choux 發表在 痞客邦 留言(0) 人氣()


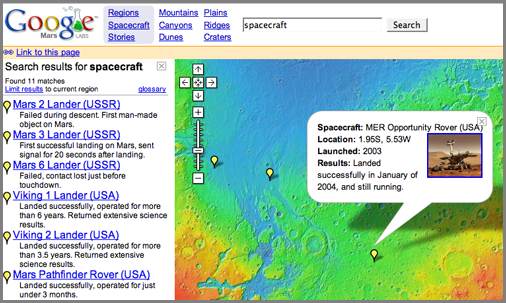
http://www.google.com/mars/

choux 發表在 痞客邦 留言(0) 人氣()

Blog Stats
⚠️

成人內容提醒

本部落格內容僅限年滿十八歲者瀏覽。
若您未滿十八歲,請立即離開。

已滿十八歲者,亦請勿將內容提供給未成年人士。